I have a passion for jumping off big vertical cliffs. Alongside that adventure I try to capture photographs of some of those moments I experience when I am flying. So I am trying to combine free falling with photography.

Every time I get a chance to bring my camera to the mountain I feel that I have the opportunity to learn something new about photography. Because every jump is so unique in it’s nature, there is a lot of considerations going through my mind, and it takes a good deal of preparation and forward thinking to get everything right, and most importantly – to make every jump as safe as possible.
Every jump is unique because I might be jumping with people I haven’t jumped with before, or perhaps I am going to jump a cliff that I’m not 100 percent familiar with. Also weather changes in particular mean that any initial plan will sometimes need to be modified in order to work, or even be aborted. So I make individual assessments of each cliff and situation, in order to judge it a safe jump for shooting photographs or not.
Planning – and sticking to the plan
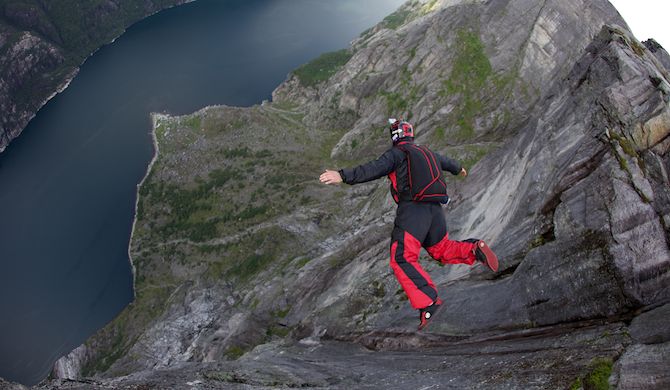
Before I step off any edge I agree to a plan with the subject I am photographing. Here I am following Patto off exit 6 at Kjerag. Planning and agreeing to the jump, and sticking to that plan is key. I had seen Patto jump several times, some I knew exactly what to expect once we jumped. I knew that he always is slightly head high, and then quickly goes into a short dive to build speed for the “take off” of his track.

So that made my task easy, just follow his exit flow, shoot the exit shots, then stay with him for a short while for a few more images and then slowing down my speed for a high opening. I also managed to capture the happy sunny handshake moment after the successful jump.
I was lucky that photographer Håkan Nyberg was at the mountain that day, and he was kind enough to share some of his images with me. Håkan is building his new web site at www.hakannyberg.com
Assessing light conditions
My biggest challenge so far has been to assess and predict the light conditions throughout the jump. So making my aperture and shutter speed choices become my primary tasks after planning the jump with the person/persons I am photographing.
Like at Kjerag in Norway my subjects are often exposed to strong sunlight at the top of the mountain. But as soon as we step off the edge and start falling we then slip into the shade of the cliff. On the day I did these images with Patto, it was quite lates in the afternoon, so light conditions were good all the way to the bottom.
Playing safe
However, camera settings, light conditions and watching for the right angles can become NOT VERY IMPORTANT. Well, on a base jump that is… My point is, once I am ready to make the last few steps towards the exit point, I don’t really care about the potentially fantastic images I could capture. My primary focus is on executing a safe and fun jump.
I like to think of every jump in different “safety-stages”:
- Checking my base jumping rig and tracking suit (pins, bridle, pilot chute, cables, straps)
- Putting on my rig and tracking suit – and re-checking leg/chest straps, zippers and pilot chute reach
- Then checking helmet, and that camera is mounted safely
- Agreeing to jump plan, checking light conditions
- When ready to jump, I double check leg/chest straps, helmet chin cup is secured and pilot chite reach
- Then I can walk to the edge and jump
- MOST importantly: Having FUN!
Photography challenges
The forces involved with carrying a heavy camera and lens mounted to my helmet are significant when applied to the base jumping environment. In most cases you can pack your base parachute for a sweet opening,
and you can position yourself for a smooth opening. But opening from a high speed track or dive can really put some serious strain to my body.
My solution so far has been to add an additional margin to leave time for potential issues that require “immediate problem solving attention”. Like line twists which may put additional strain on my neck. So opening high and slowing down my horizontal speed from the track works well for me.
Stay tuned for Part 2 of this article
In part 2 I will elaborate a bit more on these topics:
- Difference between failure and succes
- Not knowing what to expect
- Not going according to plan
- Equipment I am using
- Future plans – why not fly a wingsuit?
